
Deploy Services to Sites with Edge Computing

Purpose
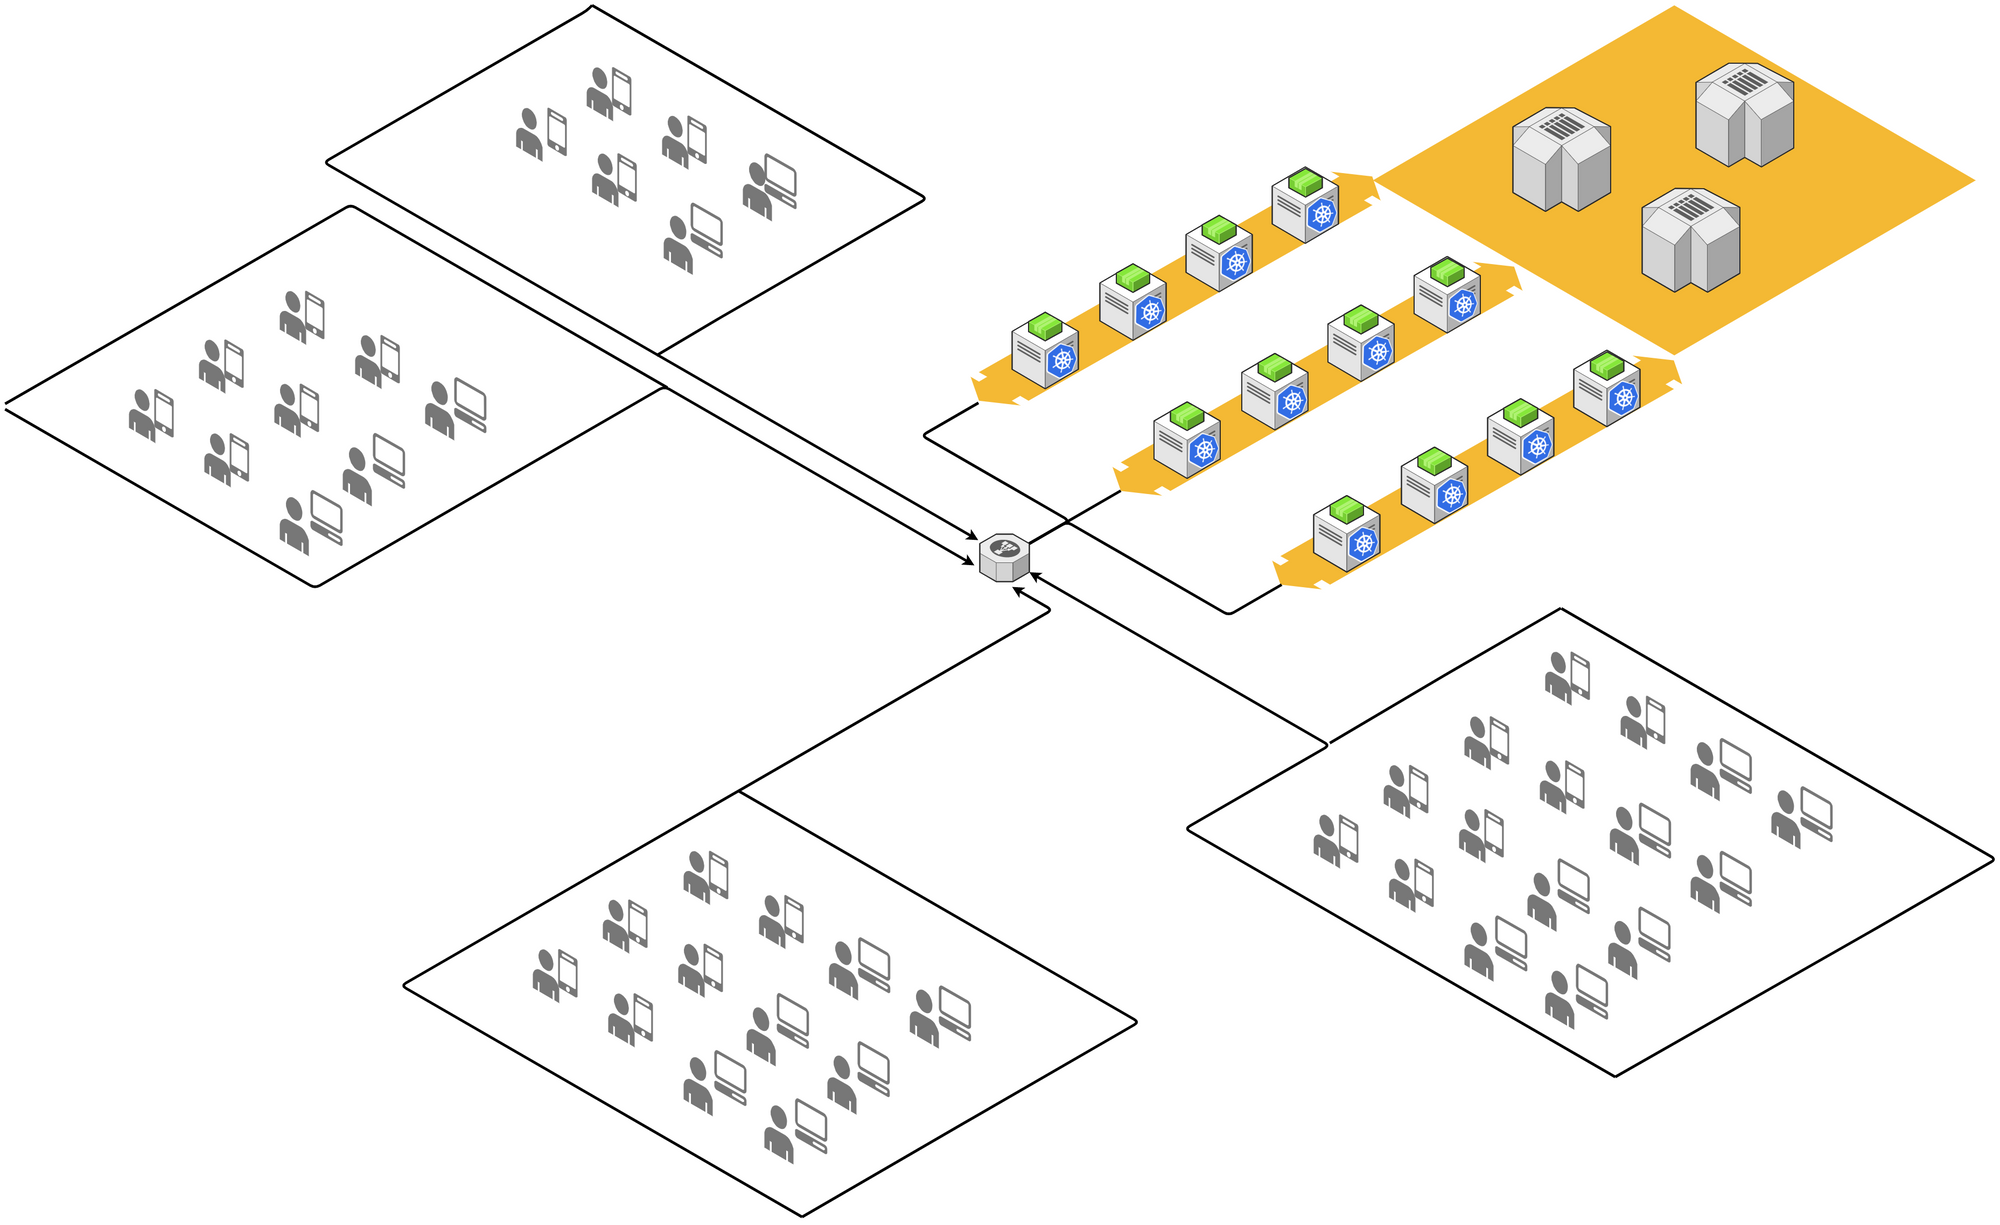
A typical modern cloud-based application is structured as below diagram.
Functions are implemented by microservices as APIs, which are running in the containers and managed by Kubernetes cluster.
Data are persisted in RDBMS, NoSQL database or Object Storage.
Users are accessing the APIs via different type of devices and clients (typically the HTML 5 page or native App) from remote sites.
API requests/responses are going through load-balancer and API gateways to hit the microservices.
Kubernetes clusters, databases, storages and other infrastructure services
are hosted on cloud datacenter or provided by cloud supplier as PaaS.
This architecture could be good for online shopping and booking as the end-users are discretely accessing from anywhere of the world. Although the architecture ensures high availability at cloud data center, in our real business scenarios, pain points are still there.
One of the pain points is network. The internet bandwidth and quality are increased significantly in the last decade, especially with the 5G LTE technology, inland high speed internet access is available and affordable in most of the areas. However, internet connection is not stable enough and guaranteed at user end. For mission critical use, if system is unavailable for few minutes, it could cause huge sales loss, customer unsatisfaction or even life threat. Some cases require application to response in restricted latency, otherwise the production line could be stuck.
On another hand, in some use cases, application is not only interacting with human but also the machines, there could be inputs from a bunch of sensors and outputs to servo drives, printers, heater and so on.
In some cases, data transmission volume is network unfriendly, such as photo, video stream, and sensor measurements. It is not efficient to send raw data to cloud all the time.
To comply with these requirements, the classical IT solution is to deploy local instances of the application. In case centralization is required, a complex integration will be introduced.
This kind of solutions were there for many years. The shortages are obvious in terms of the cost, stability, and maintainability.
In this mobile internet and IoT age, how can we tackle these challenges with modern solutions?
What to Propose
The expected solution is to move more power of computation from cloud data center to users' location, make the services closer to users, meanwhile minimize the efforts of deployment and maintenance.
The idea is from the concept of Edge Computing, which is not a new invention. In cyber world, a content delivery network (CDN) is a typical edge computing which makes web contents closer to users. The hot Autonomous Driving technology is also more on edge computing than cloud computing.
Compared to those edge computing cases, our edge computing is more private for company business applications. The computing devices are to be installed in the users' location such as retail stores, workshops, and warehouses instead of the ISP's infrastructures.
This solution is trying to leverage users' local network and make the application able to serve users even when internet is temporarily unavailable. In another hand, and local installed edge device can also interact with things via the local connection protocols such as Bluetooth, Zigbee and Modbus.
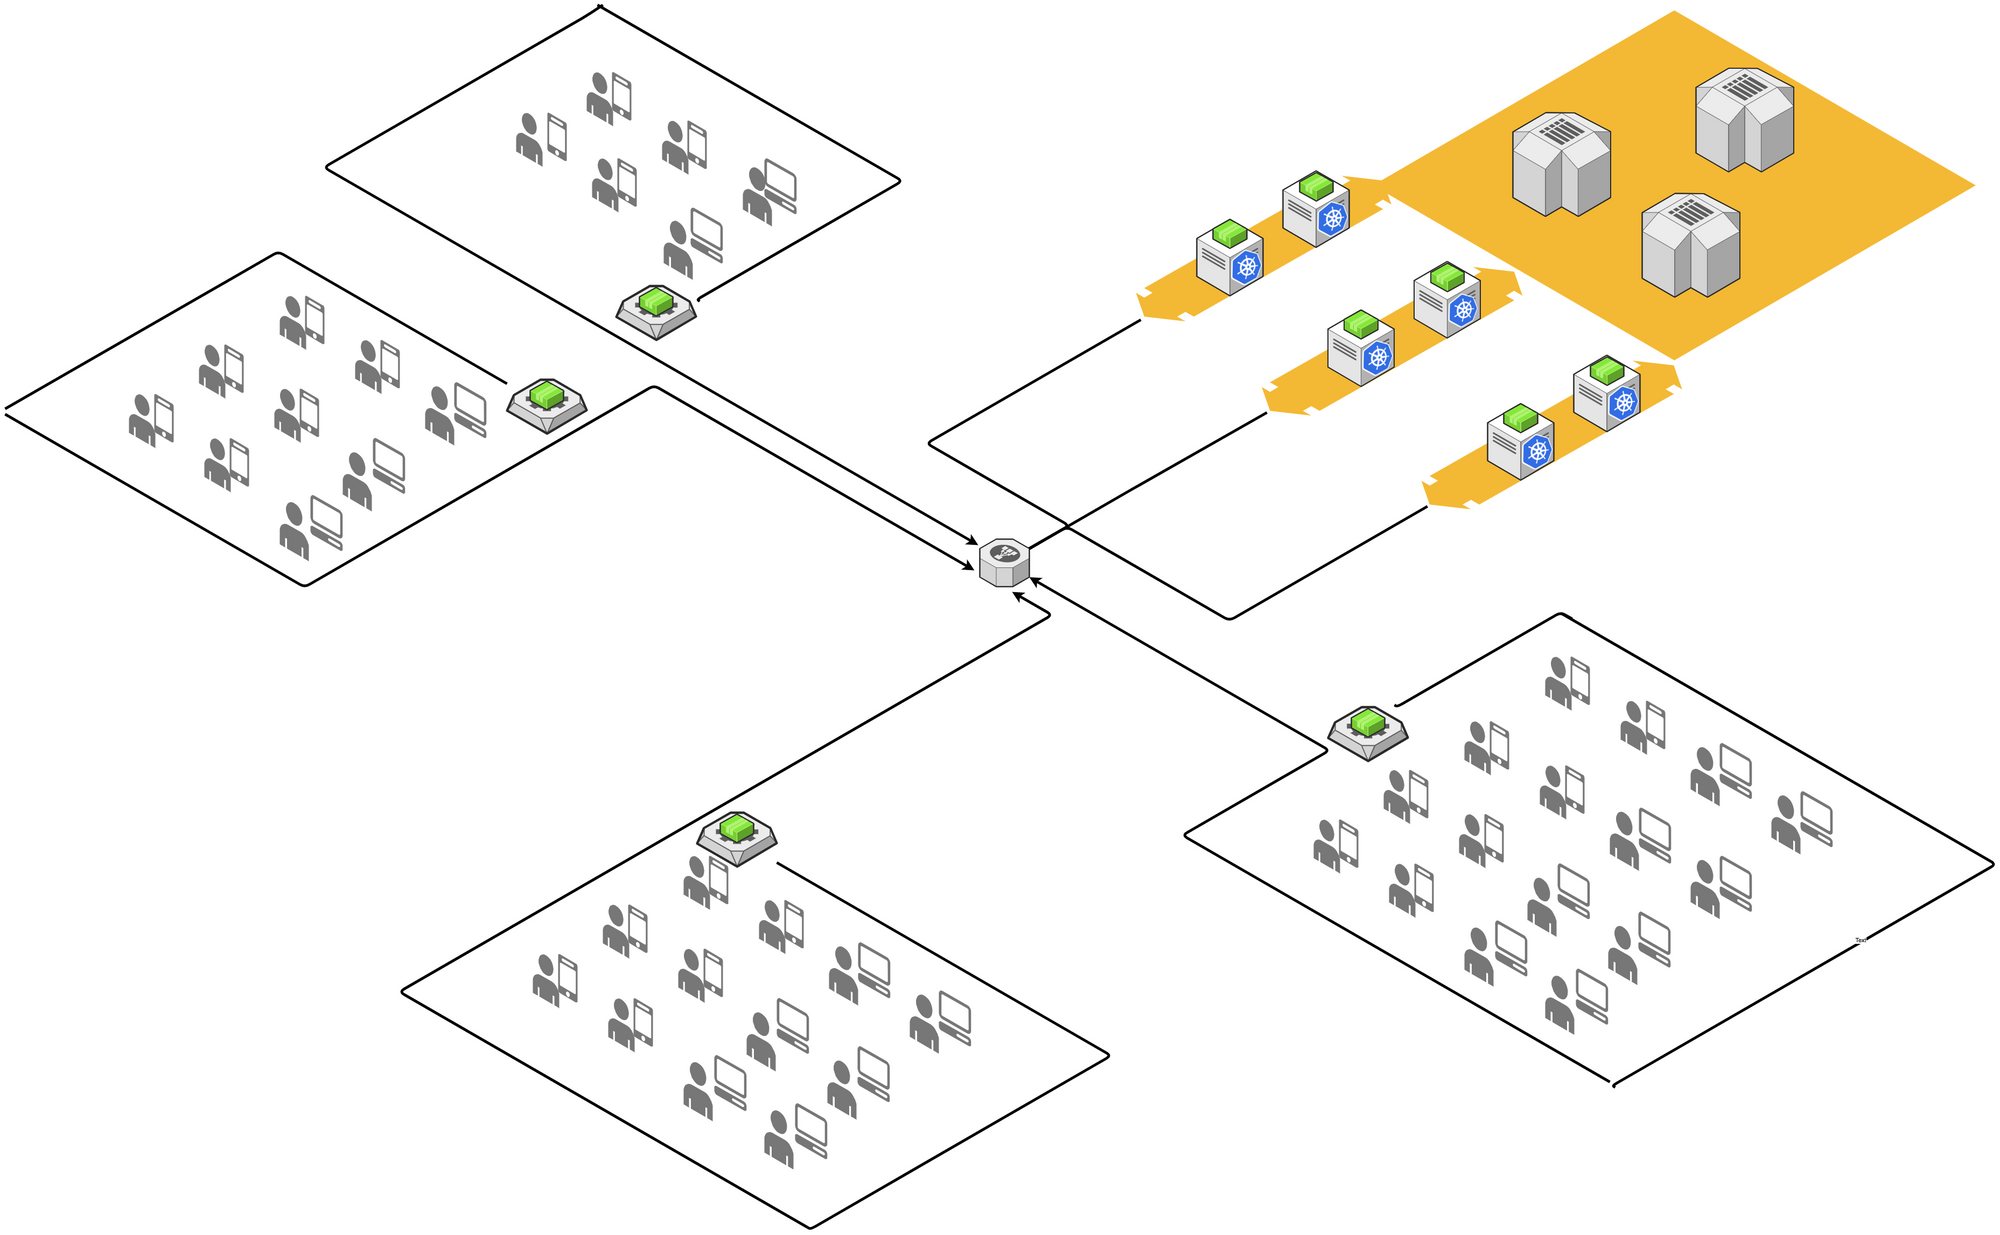
In below high-level architecture, we eliminate part of the worker nodes in cloud data center and distribute the power of computation to edge side. Application runs on top of the edge devices formed cluster as they were running on Kubernetes cluster.
To turn the concept into a specific business application solution, we need to tackle several challenges.
1- Security
Security is the key concern when we consider distributing the services to outside of data center. Data stored on edge device must be protected, and connection between cloud and edge must be secured. In case the device is disassembled or stolen, it must be disabled in time.
2- Accessibility
Due to the limit of IP v4, most of the ISPs are not providing dedicated public IP to users, which means the edge device is behind a NAT. This brings challenges of accessibility for remote control to the device.
3- Maintainability
Edge device is hosted at users' site where could be thousands of kilometers far from administrator. And usually there is no professional operator at users' site. Send device back and force will take several days. We have to minimize the operation on device, make the installation as easy as out-of-box and plug-and-play.
4-Reliability
The environments of users' site are varied, there might not be stable power supply, network and air conditioner as standard server room. Edge device has to work against the poor circumstance.
Overall Architecture
To make edge devices managed centrally, we need to form them into a cluster, so that the administrator can easily add, remove, or update services into specific device nodes, monitor the liveness of the service and restart dead service automatically. We have experience of Kubernetes to manage cluster in data center, now we are looking for such a lightweight service orchestration tool. Rancher K3S is such a Kubernetes distribution designed for Edge and IoT devices including ARM. K3S master servers will be deployed in cloud data center, K3S agent will be installed on edge devices (worker node), in which service container will deployed as Pod.
Although K3S provides Kubernetes Clustering networking feature, it is still difficult and unsafe to communicate between hosts (server nodes and edge nodes) which are crossing internet and behind different NATs. We need to build VPN tunnels between remote edge nodes and server nodes in cloud data center, so that all the nodes of a cluster can work in a virtual subnet. Not like traditional IPSec or SSL VPN, WireGuard is a new VPN solution providing secure enough, fast handshake, high-performance encryption/decryption, easy configuration and cross-platform support. We will use WireGuard to build up an underlayer host-to-host virtual network to support the distributed K3S cluster.
Beside of these, we also leverage Rancher to simplify cluster operation, and a Helm repository to store Helm Charts.
On top of the cluster, application will be optimized at both edge and cloud side services. If a service is frequently accessed by the users in the same site, and data is not shared with other sites, this service can be deployed to edge, e.g., warehouse stock management services are most frequently accessed by warehouse users, but stock data usually does not share with other warehouses. These services will be deployed to edge, but application team need to consider data synchronization between edge and cloud for data backup, restore and analysis purpose. Nowadays, we have Kafka to collect data from different sources and distribute data to multiple receivers, we can leverage Kafka to be the hub to collect and distribute data between edge and cloud. Some of the services which are sharing the data for all the users, e.g., the services for consumer membership, must be running on the cloud. Edge will act as a proxy to re-direct the request to cloud. This will make edge transparent to application front-end.

Prove the Design
To prove the feasibility of above architecture, some experiments have been performed. Here are the steps.
Edge Device Sourcing
Edge device is an embedded system. It is a special computer having CPU, RAM and flash memory soldered on a single PCB, supplying input/output peripheral interfaces, and usually having no monitor and keyboard. There are many choices in the market with different specs such as CPU architecture, size of RAM/CPU cores, flash memory and type of peripheral IO (USB, Ethernet, Wi-Fi, Bluetooth, UART, IIC, A/D, PCM...).
Popular CPU architectures are ARM64 and X86-64, for cost and power dissipation consideration, ARM64 is preferred. Especially the edge device is usually installed in a non-standard server room, low power dissipation means fanless heatsink and high reliability. A famous ARM development board is Raspberry Pi series. The latest board model has up to 8GB DDR4 SDRAM and Quad core Cortex-A72 CPU, it is more than enough to run an ERP for small business on it. Raspberry Pi is more powerful on processing multi-media and high definition displaying area, for running headless microservices, it is a bit luxury. And its power dissipation volume is also considerable, we need a cooling fan to control the temperature. Another limitation is the storage, Raspberry Pi only support TF card as OS boot and data storage, which limits the file system performance and reliability. The removable TF card is also a security risk.
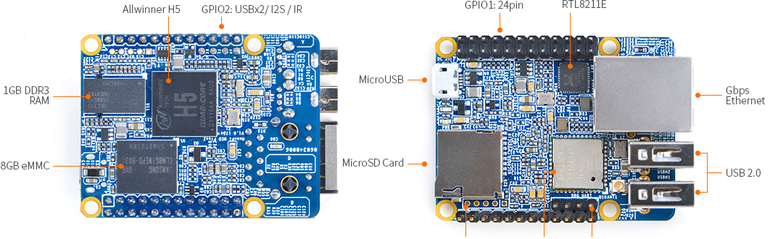
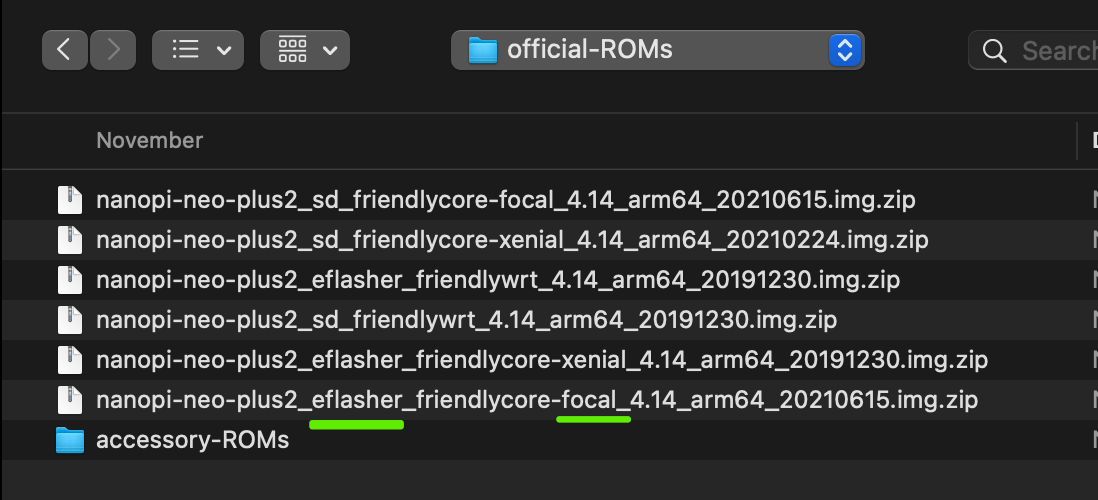
There are many cost-effective PIs (ARM-based development boards) available as alternatives of Raspberry Pi, such as Orange Pi, Banana Pi, Mango Pi sounds like a dessert shop. Among them, NanoPi series offers smaller size, on-board eMMC option and equivalent CPU power. The most attractive thing is that the cost is only 40% of Raspberry Pi with similar configuration. In this article, we take NanoPi Neo Plus2 to evaluate the solution feasibility. The major reason is that this model provides all the required configuration, gigabit ethernet, on-board 8GB eMMC (worth $10), 1GB SDRAM with a pretty price about $25 (similar board Raspberry Pi 3 Model B without eMMC is for $35). Another reason to choose NanoPi is that NanoPi provides official image based on UbuntuCore. The latest version is based on Ubuntu 20.04.3 LTS (Focal Fossa) This provides more compatibility with other software.
As the NanoPi is named, the board size is less than a credit card.
Setup
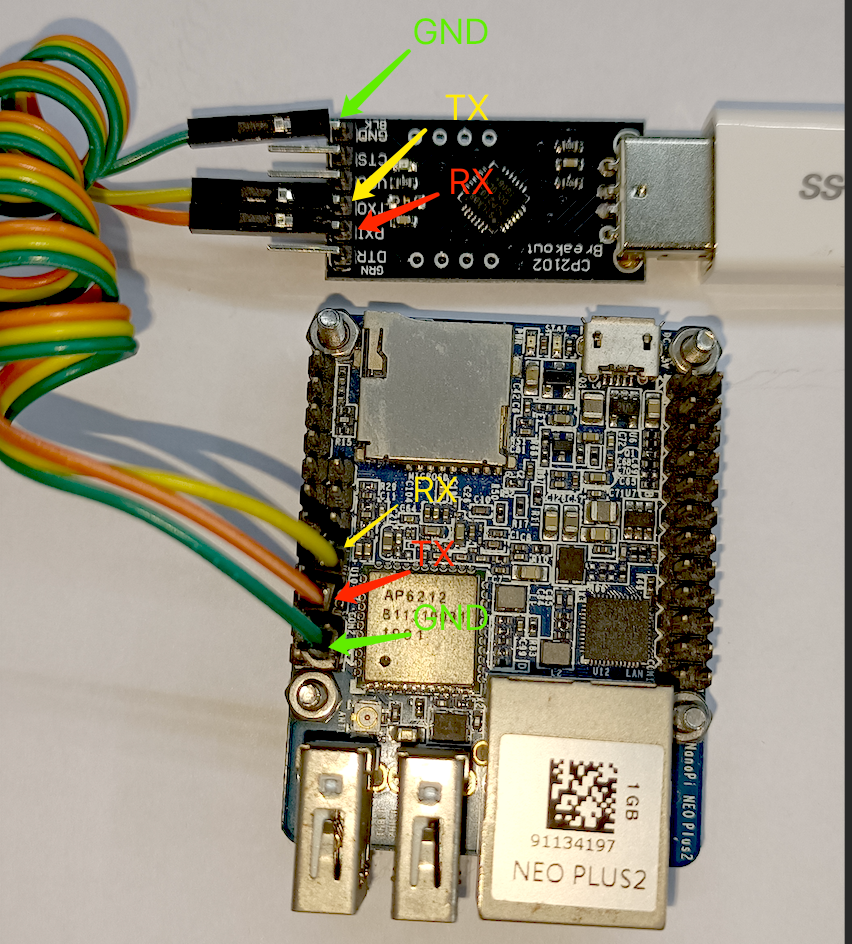
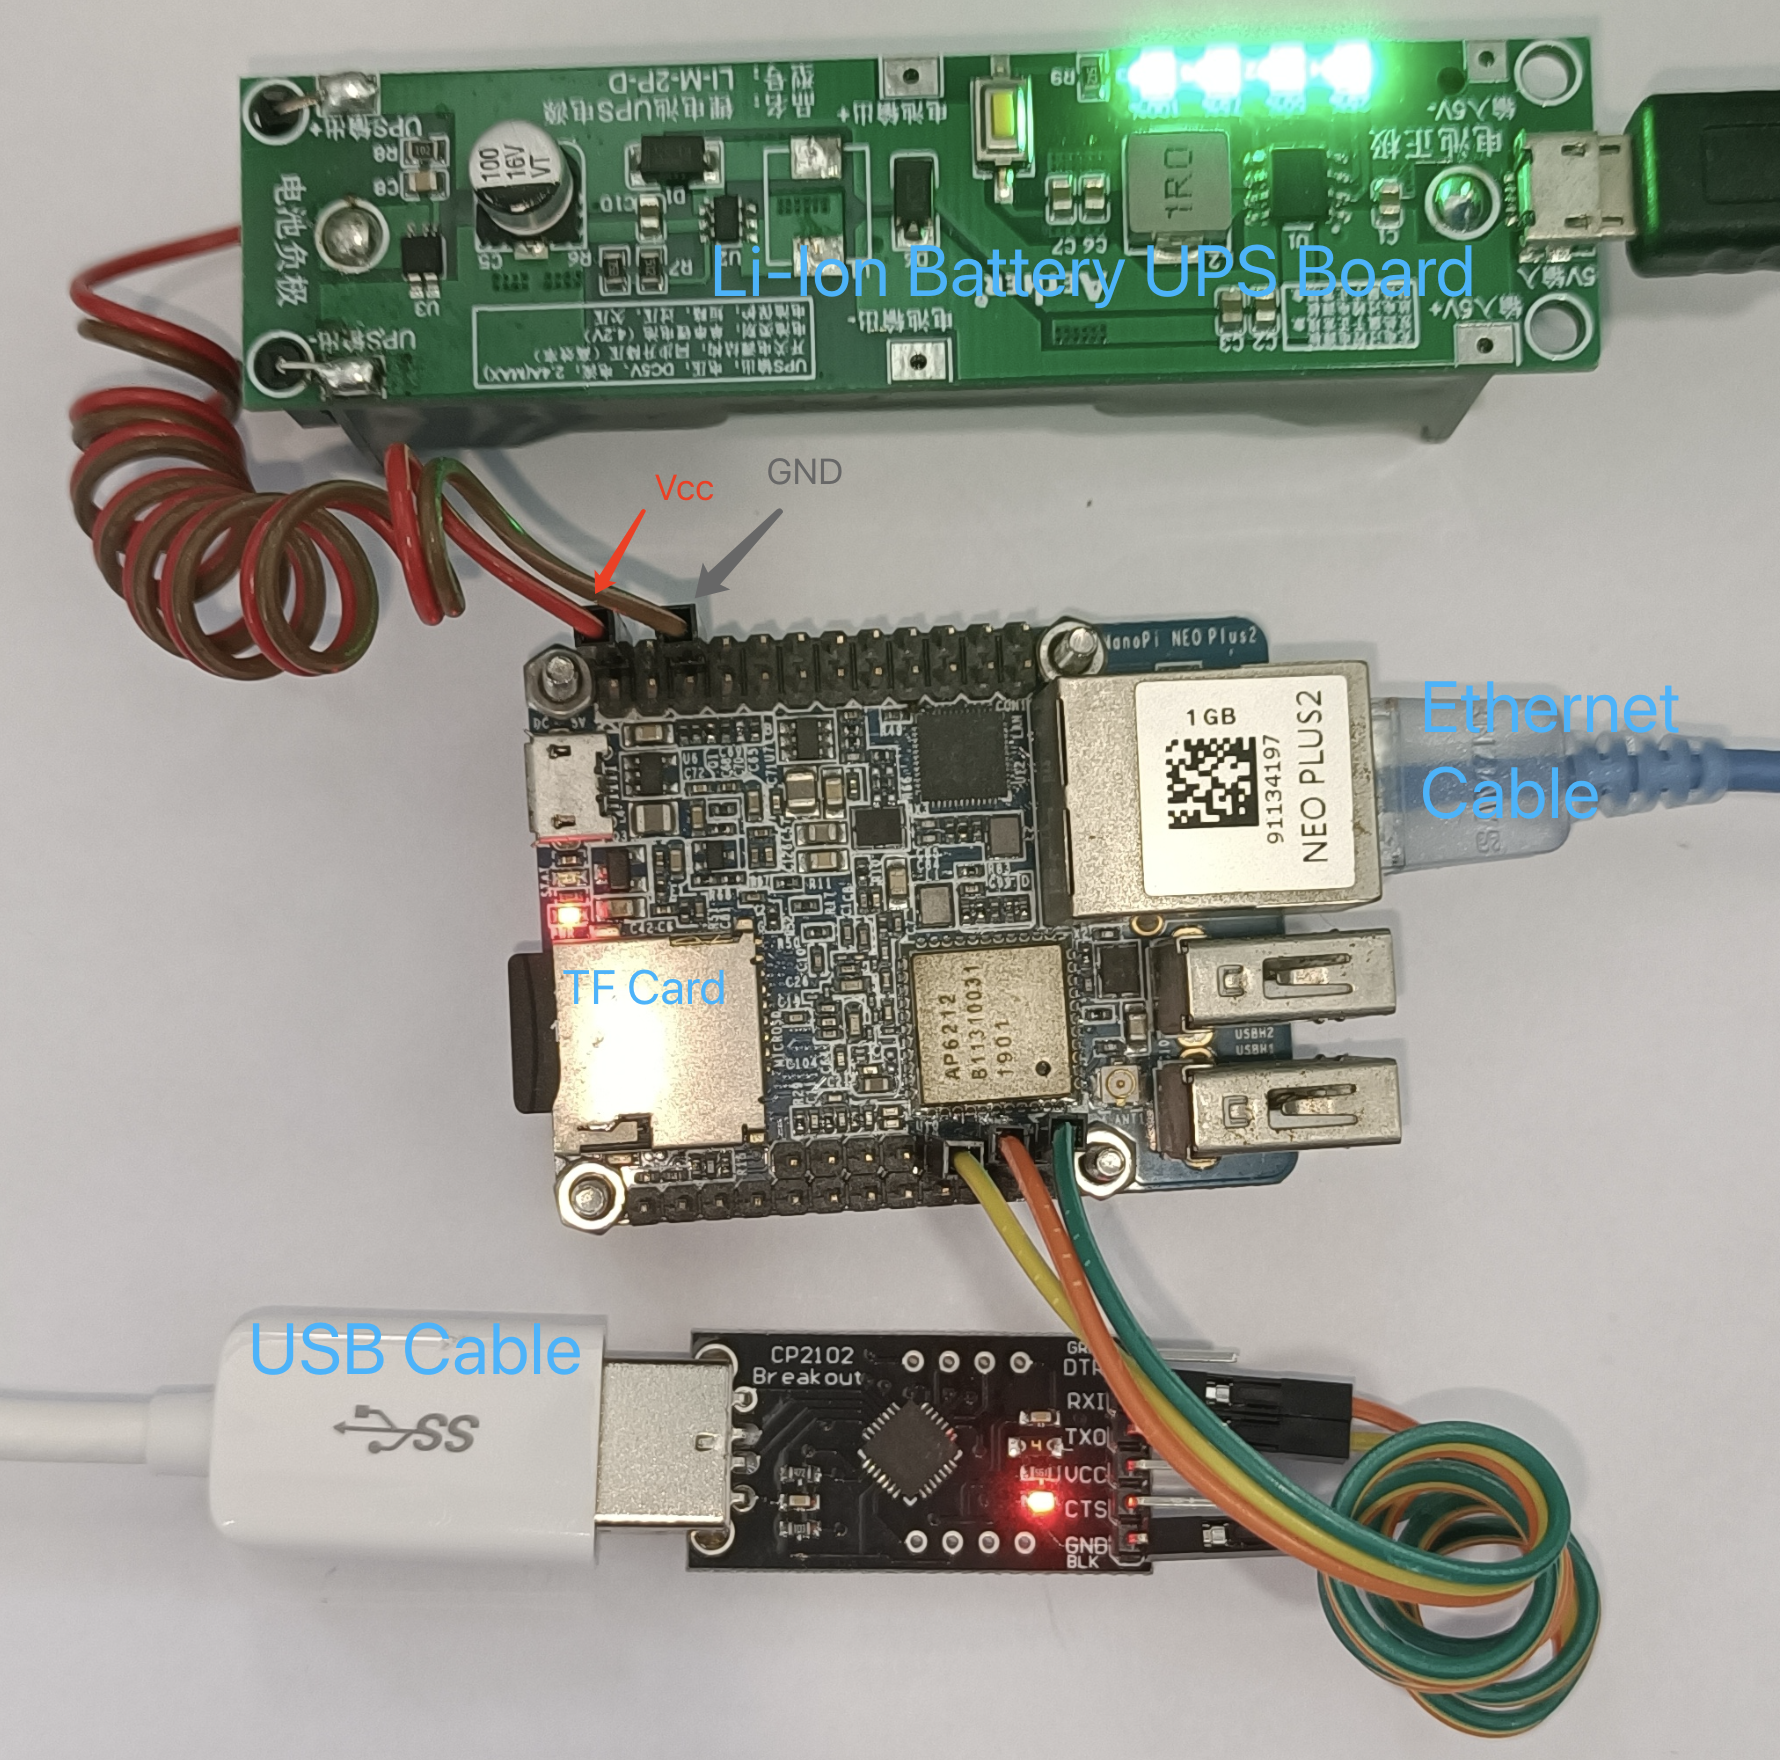
NanoPi Neo Plus2 needs to be initialized by flashing the OS image into its eMMC. A TF card with capacity above 8GB is required. The setup efficiency is related with the TF card read/write speed, so Class 10 above is recommended. Since it has no display port, a USB-TTL adapter (aka Console Cable) is also required, be careful it must be TTL voltage levels 0V to +5V, instead of RS323 voltage levels -13V to +15V.
Refer to official board pin layout, connect to NanoPi board UART TTL pins. To avoid Vcc conflict, skip Vcc pin.

Connect TTL adapter pins to NanoPi board pins in below order:
GND <-> GND
TX <-> RX
RX <-> TX
Prepare a bootable TF card with OS image
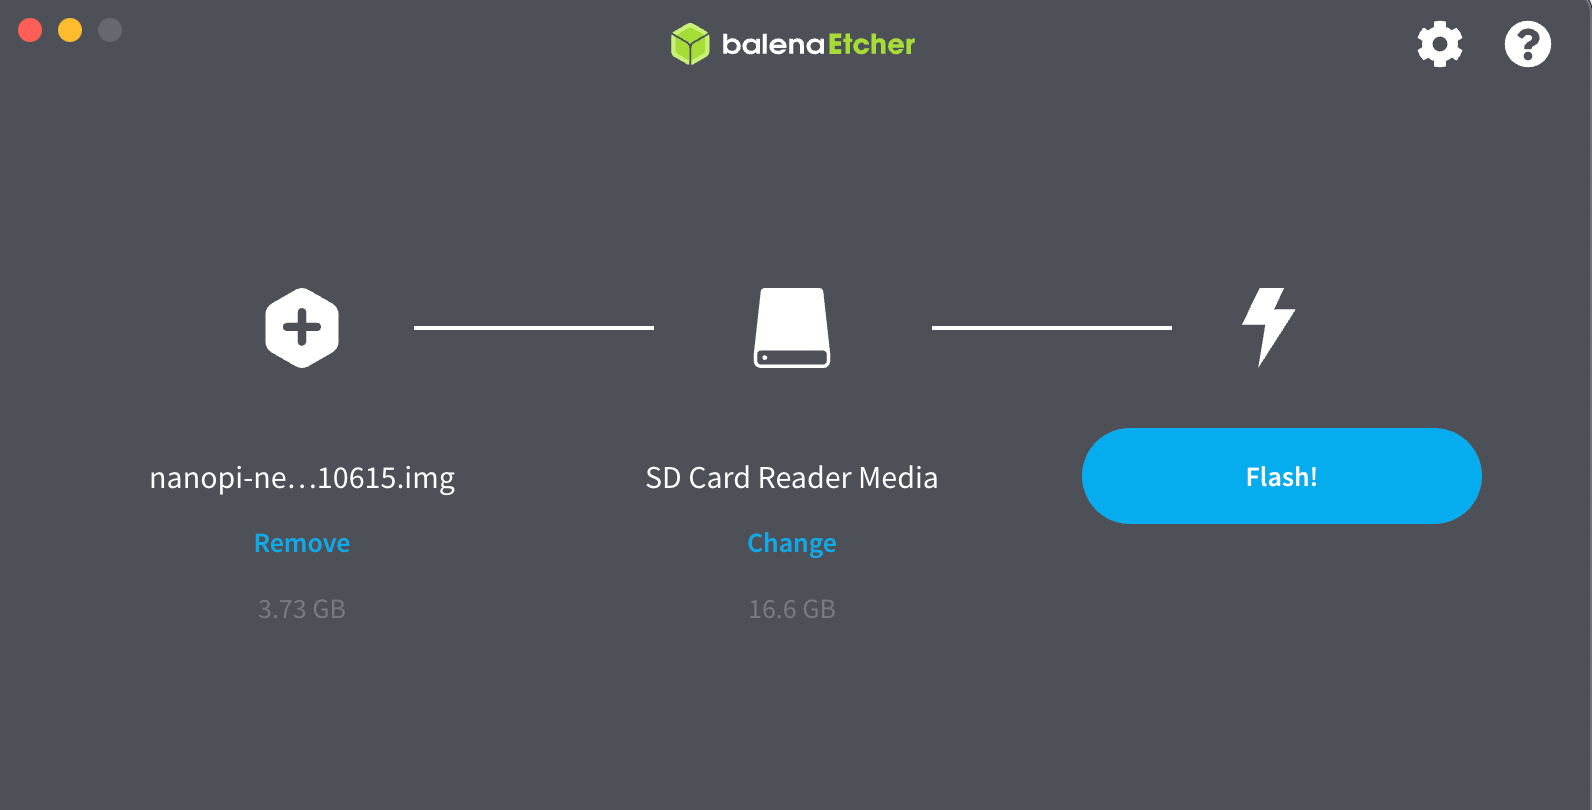
Flash official OS image on PC with the flashing tool balenaEtcher, choose "Flash from file" and pick the image with eflasher.
Insert the TF card into NanoPi board TF socket, connect USB-TTL adapter to PC USB port, connect +5V Vcc to NanoPi board to power on and boot from TF card. NanoPi Neo Plus2 provides a micro-USB port and Vcc pin for power supply. To avoid data loss, a Li-Ion battery UPS board is used.
On PC end, use terminal tool to interact with NanoPi. In MacOS, screen command is a build-in terminal tool.
First, determine the USB device
$ ls /dev/tty.usb*
/dev/tty.usbserial-0001
Then use screen tool to connect this device, baud rate 115200
$ screen /dev/tty.usbserial-0001 115200
Once terminal is connected, and OS boots up successfully (as shown below), we can start to login and run eflasher to flash OS from TF card to eMMC.
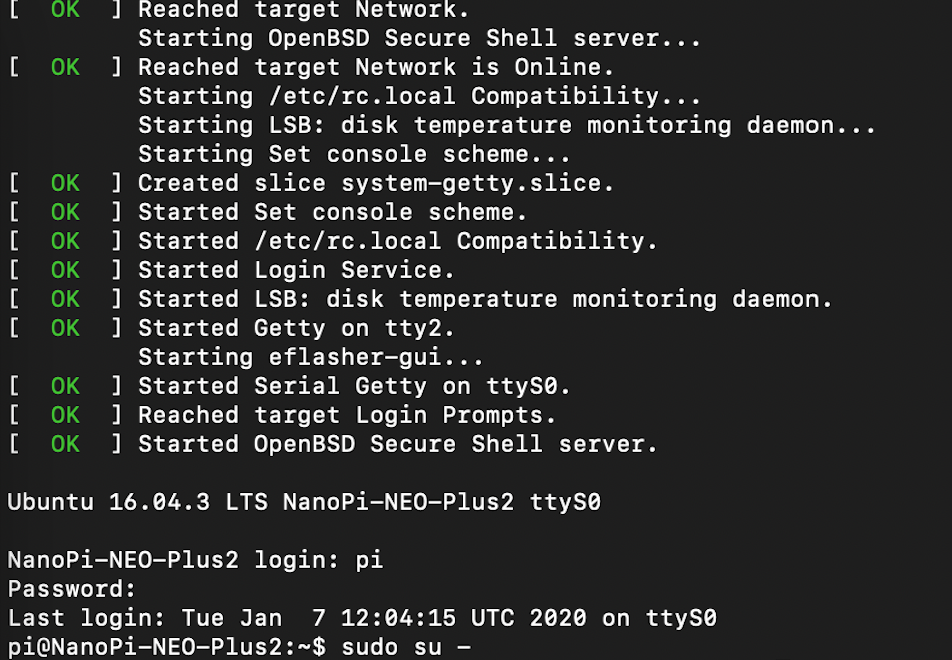
Switch to root
$ sudo su -
Run eflasher, be sure to disable Overlayfs
# eflasher -i /mnt/sdcard/friendlycore-focal_4.14_armhf --disable-overlayfsAfter eflaher finishes its work, remove TF card and reboot NanoPi from eMMC. From terminal we can see the newly installed OS login interface
At the first-time boot, login is automatic as default user pi, connect ethernet cable and start update
$ sudo apt update
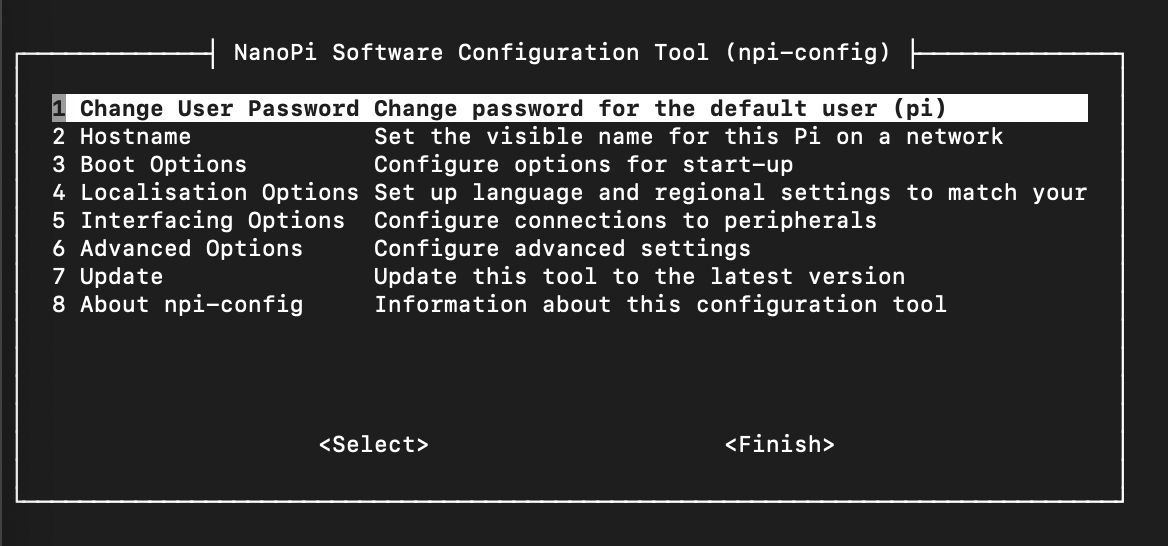
Run util npi-config to do initial setup
$ sudo npi-config
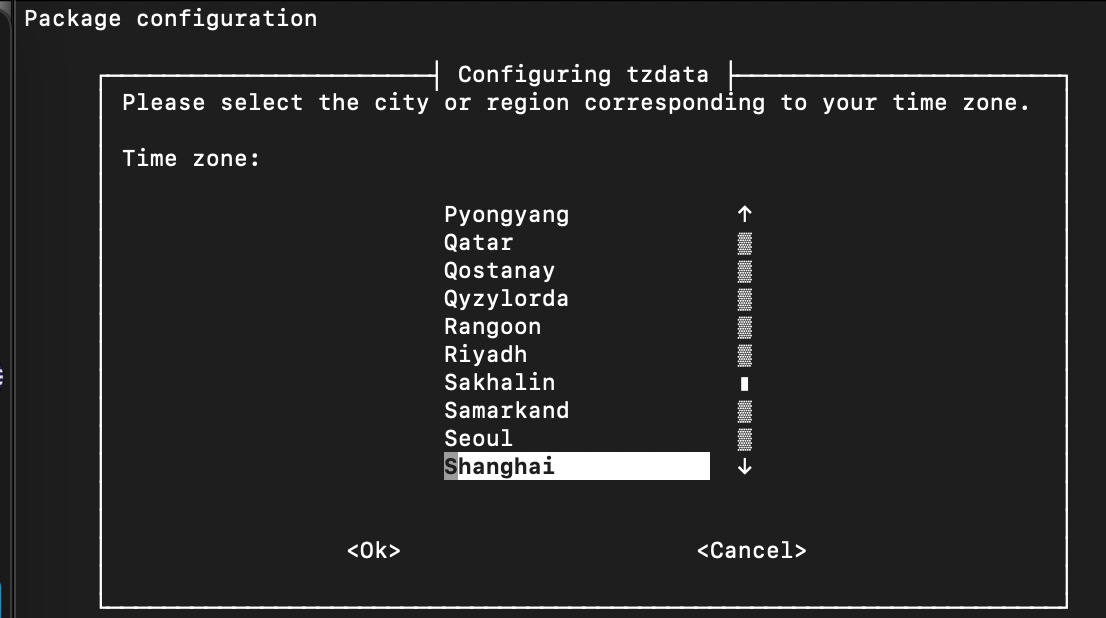
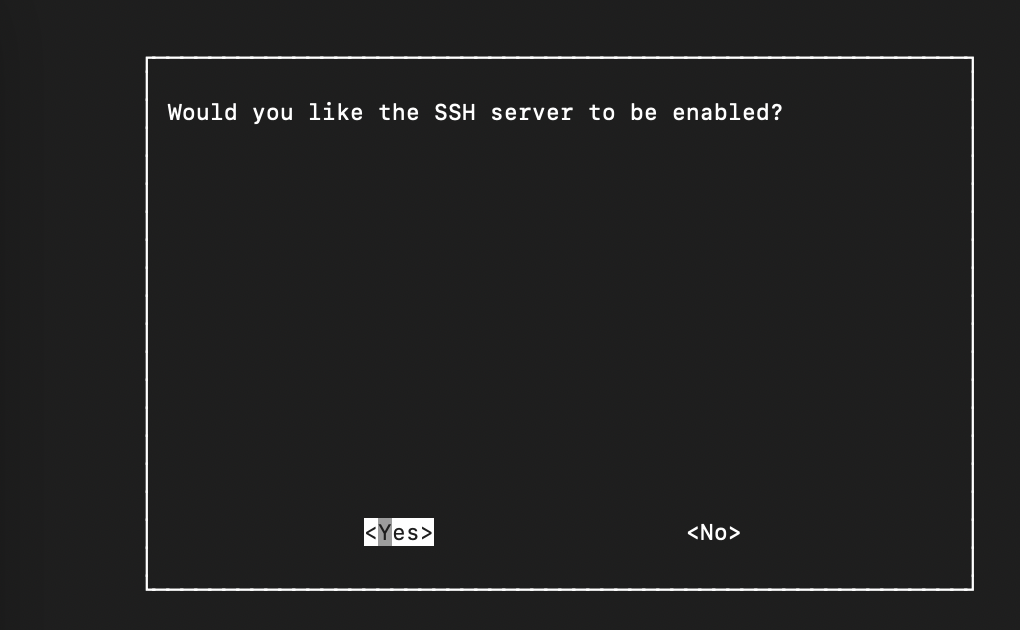
By using npi-config, change the default password for default user pi, set the hostname, disable auto login at start-up, set the time zone, and enable ssh server.
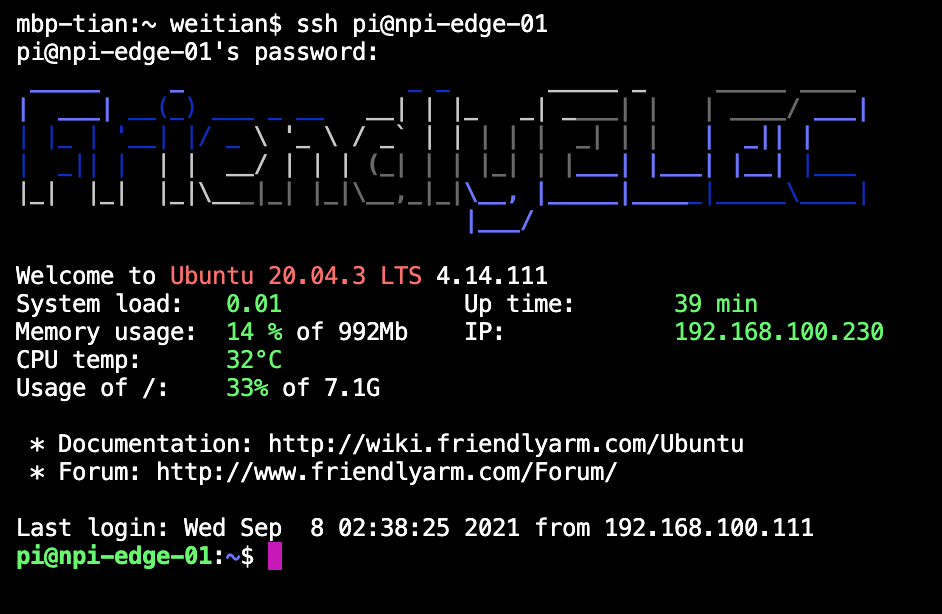
After initial setting, we can connect to NanoPi via ssh from PC without USB-TTL adapter. On MacOS terminal, use below command to access NanoPi
The first NanoPi Edge device hostname is npi-edge-01
$ ssh pi@npi-dege-01
When this screen is shown, the edge device setup is done
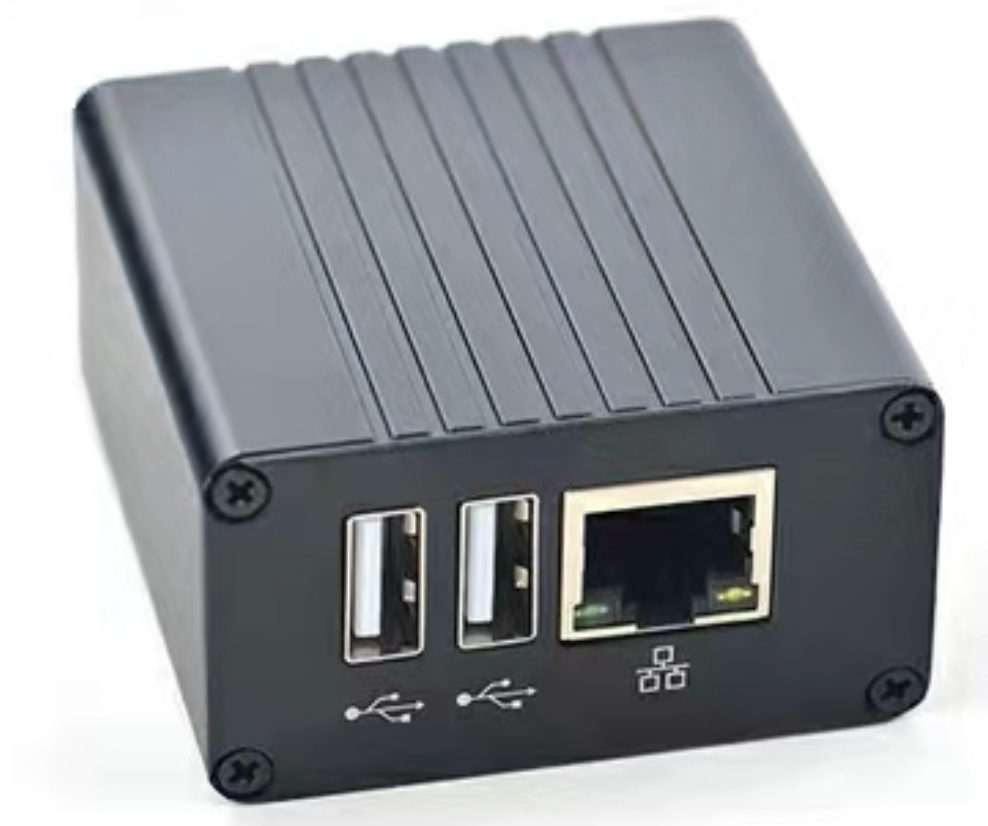
When the initial setup is done, the NanoPi board can be packaged into an aluminum alloy case to prevent it from dust and disassembly.
Now your edge is equipped.

Network Plan
Before setting up WireGuard virtual private network, we need to plan the network.
To manage thousands of edges in the future, and avoid conflicting with enterprise class A private network, we choose a class B private network IP range.
IPv4 Subnet: 172.30.16.0/20
IP range: 172.30.16.1 - 172.30.31.254
WireGuard Server IP: 172.30.16.1 - 172.30.16.30
WireGuard Client IP:
- Servers: 172.30.16.31 - 172.30.16.254
- Edges: 172.30.17.1 - 172.30.31.254
One cloud VM as WireGuard server, IP: 172.30.16.1
One cloud VM as K3S server, IP: 172.30.16.31
One Edge Computing device (hereafter called edge device) as K3S agent, IP: 172.30.17.1
Setup WireGuard server
Update APT (Advanced Package Tool)
$ sudo apt update
$ sudo apt upgrade
Install WireGuard server
$ sudo apt install wireguard
Configuring WireGuard server
$ sudo -i
# cd /etc/wireguard/
Generate private and public keys for WireGuard tunnel
# umask 077; wg genkey | tee privatekey | wg pubkey > publickey
Set Up WG server by creating /etc/wireguard/wg0.conf File with below content
[Interface]
## My WG server private IP address ##
Address = 172.30.16.1/20

## My WG server port ##
ListenPort = 41194

## WG server's private key i.e. /etc/wireguard/privatekey ##
PrivateKey = <<replace private key here>>
Enable IP forwarding
# sysctl -w net.ipv4.ip_forward=1
Enable and start WireGuard service
# systemctl enable wg-quick@wg0
# systemctl start wg-quick@wg0
Setup WireGuard client on K3S server
Update APT (Advanced Package Tool)
$ sudo apt update
$ sudo apt upgrade
Install WireGuard server
$ sudo apt install wireguard
Configuring WireGuard server
$ sudo -i
# cd /etc/wireguard/
Generate private and public keys for WireGuard tunnel
# umask 077; wg genkey | tee privatekey | wg pubkey > publickey
Set Up WG server by creating /etc/wireguard/wg0.conf File with below content
[Interface]
## This client's private key i.e. /etc/wireguard/privatekey ##
PrivateKey = <<replace private key here>>

## Client IP address ##
Address = 172.30.16.31/32

[Peer]
## WireGuard server public key ##
PublicKey = umLi+oq8r9ad/z1PJA4DcvOimJNXfpOhuA/yKEx1cnQ=

## set ACL ##
AllowedIPs = 172.30.16.0/20

## WireGuard server's public IPv4/IPv6 address and port ##
Endpoint = <<replace WG server public IP>>:41194

##  Key connection alive ##
PersistentKeepalive = 15
Enable and start WireGuard service
# systemctl enable wg-quick@wg0
# systemctl start wg-quick@wg0
Setup WireGuard client on K3S agent
Update APT (Advanced Package Tool)
$ sudo apt update
$ sudo apt upgrade
Install WireGuard server
$ sudo apt install wireguard
Configuring WireGuard server
$ sudo -i
# cd /etc/wireguard/
Generate private and public keys for WireGuard tunnel
# umask 077; wg genkey | tee privatekey | wg pubkey > publickey
Set Up WG server by creating /etc/wireguard/wg0.conf File with below content
[Interface]
## This client's private key i.e. /etc/wireguard/privatekey ##
PrivateKey = <<replace private key here>>

## Client IP address ##
Address = 172.30.17.1/32

[Peer]
## WireGuard server public key ##
PublicKey = umLi+oq8r9ad/z1PJA4DcvOimJNXfpOhuA/yKEx1cnQ=

## set ACL ##
AllowedIPs = 172.30.16.0/20

## WireGuard server's public IPv4/IPv6 address and port ##
Endpoint = <<replace WG server public IP>>:41194

##  Key connection alive ##
PersistentKeepalive = 15
Enable and start WireGuard service
# systemctl enable wg-quick@wg0
# systemctl start wg-quick@wg0
Add peers on WireGuard server
add peer for K3S server
$ sudo wg set wg0 peer G2fbW7tr9JrmkaCQsYc66FLWaV3QGtw60fI5xel6pkQ= allowed-ips 172.30.16.31/32
add peer for K3S agent
$ sudo wg set wg0 peer r+A6D6QxBu5slXv9FwPecumZWlQ1HhqDQImvFRCoVys= allowed-ips 172.30.17.1/32
save to config
$ sudo wg-quick save wg0
Install K3S server
For experiment purpose, we choose to use one-line installation, for production use, we must host the verified scripts and binary packages on private repository
Another hint here is to specify the version to make sure server and agent are on same version
$ curl -sfL https://get.k3s.io | INSTALL_K3S_VERSION=v1.21.7+k3s1 sh -
Verify the service running status
# systemctl status k3s.service
Configure the flannel overlay by creating the following systemd drop in
# /etc/systemd/system/k3s.service.d/network.conf
[Service]
ExecStart=
ExecStart=/usr/local/bin/k3s server --advertise-address 172.30.16.31 --flannel-iface=wg0
Restart K3S service
# systemctl daemon-reload
# systemctl restart k3s.service
Install K3S agent
Same as server, we use K3S official one-line online installation script
Specify the same K3S version
Get the token from K3S server
curl -sfL https://get.k3s.io | INSTALL_K3S_VERSION=v1.21.7+k3s1 K3S_URL=https://172.30.16.31:6443 K3S_TOKEN=<<replace this with the content of /var/lib/rancher/k3s/server/token on k3s server>> sh -
Verify the service running status
# systemctl status k3s-agent.service
Configure the flannel overlay by creating the following systemd drop in
# /etc/systemd/system/k3s-agent.service.d/node-ip.conf
[Service]
ExecStart=
ExecStart=/usr/local/bin/k3s agent --node-ip 172.30.17.1 --flannel-iface=wg0
Restart K3S agent service
# systemctl daemon-reload
# systemctl restart k3s-agent.service
Verify agent connection on K3S server
# kubectl get nodes
NAME          STATUS   ROLES                  AGE   VERSION
npi-edge-01   Ready    <none>                 29h   v1.21.7+k3s1
k3s-ms1       Ready    control-plane,master   29h   v1.21.7+k3s1
If you see above list, this minimum edge cluster is ready for use
Conclusion
To meet certain business use cases, we extend Kubernetes cluster from cloud to edge. This article intends to explain the feasibility with viable opensource software and hardware.
To make the whole solution available for production, we still have many areas to study, which would include:
- Automated edge provisioning
- Centralized configuration management
- High availability on edge.